Professional Headshots | How To, Tips & Helpful Tools
Professional headshots are polished photographs of your head and shoulders that show who you are in a way that resonates with your profession and industry. They often serve as your first introduction to recruiters, partners, clients, or talent managers.
Since making a good first impression is so important, it’s critical that your headshot demonstrates who you are in a way that casts you in a good light. This article explains what a professional headshot is, what types of headshots exist, what a good one looks like, and how to take a great one yourself.
If you’re creating your own professional headshot and need some help fine-tuning it, Quillbot’s AI Headshot Generator can edit your photo, change its background, and more.
Key takeaways
- Professional headshots help you make a strong first impression and build a credible, recognizable professional presence online and in person.
- Learn what makes a great headshot, from lighting and backgrounds to clothing, posing, expression, and framing, with tips tailored to different industries.
- Compare your options for getting a headshot, including hiring a photographer, taking your own photos, or using AI-assisted editing.
- Follow a practical 10-step guide to taking your own professional headshot and learn how to edit and optimize it for LinkedIn, websites, CVs, social media, and more.
Table of contents
- What is a professional headshot?
- Types of professional headshots
- What should a professional headshot look like?
- What to wear for professional headshots
- How to pose for a professional headshot
- Professional photographer vs DIY vs AI-generated headshot
- How to take your own professional headshot
- Where will you use your headshot?
- Frequently asked questions about professional headshots
What is a professional headshot?
A professional headshot is a high-quality photograph of your face and shoulders that presents you in a polished and credible way. They’re typically used in professional networks (like LinkedIn), corporate branding (like a company team page), and marketing materials (such as email signatures).
A headshot is a type of portrait. Portraits are a broader category of images in which the main subject is a person’s face and expression, and they’re typically more creative and less restrictive when it comes to composition, background, and overall style. Professional headshots, on the other hand, have more defined requirements.
That said, what constitutes a professional headshot depends on your industry and how formal or creative it is. For example, a lawyer and a graphic designer wouldn’t—and shouldn’t—use the same type of headshot.
Types of professional headshots
Understanding the different types of professional headshots helps you get a feel for how headshots can vary by industry and which type is best for you. A corporate employee, freelance designer, actor, and university professor may all need headshots, but the photographs will differ in style, setting, expression, and level of formality.
Corporate headshots
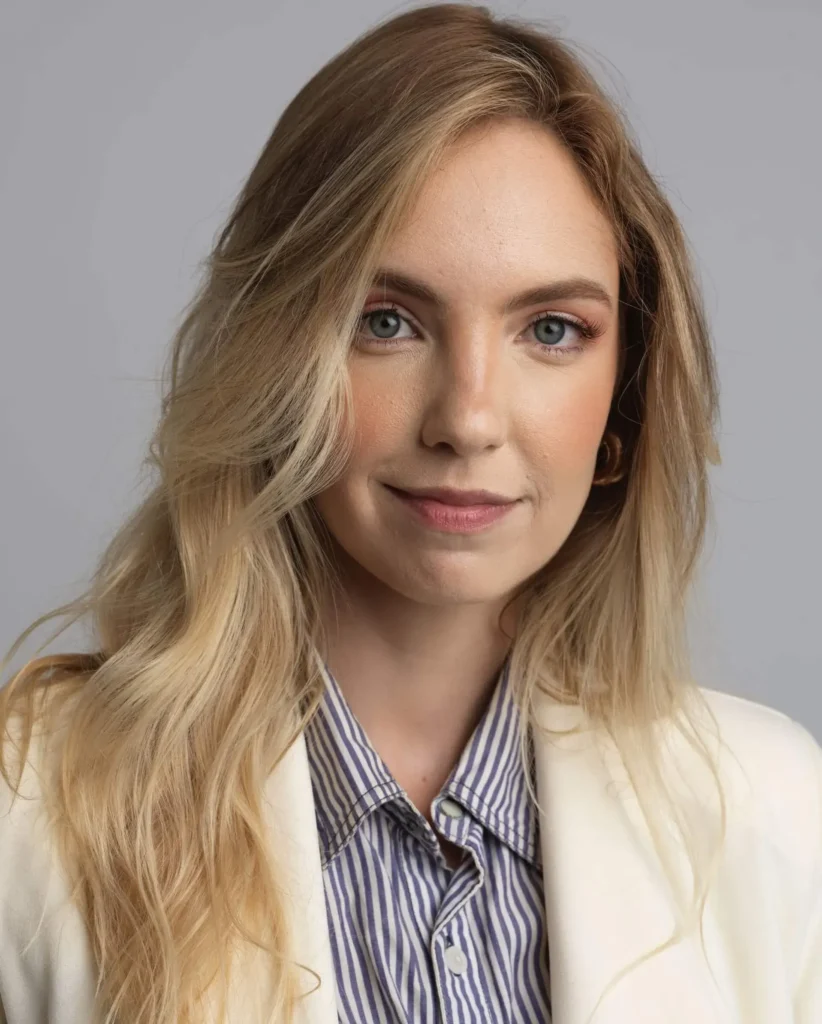
Corporate headshots, or business headshots, are used in industries where competence, reliability, and a certain level of conformity are paramount to success. Corporate headshots focus on uniform professionalism and clear trust signals. Think formal suits or blazers, neutral colors, balanced and conservative lighting, and plain backgrounds like a wall or simple office setting.
Team or employee headshots
Team or employee headshots, sometimes called “cohesive corporate headshots,” apply the same styles to the headshots for all individuals across an organization. They help humanize companies while maintaining a consistent visual identity and a polished “About Us” page. Colors, backgrounds, poses, attire, lighting, and cropping should be the same or very similar throughout all the headshots for the same team.
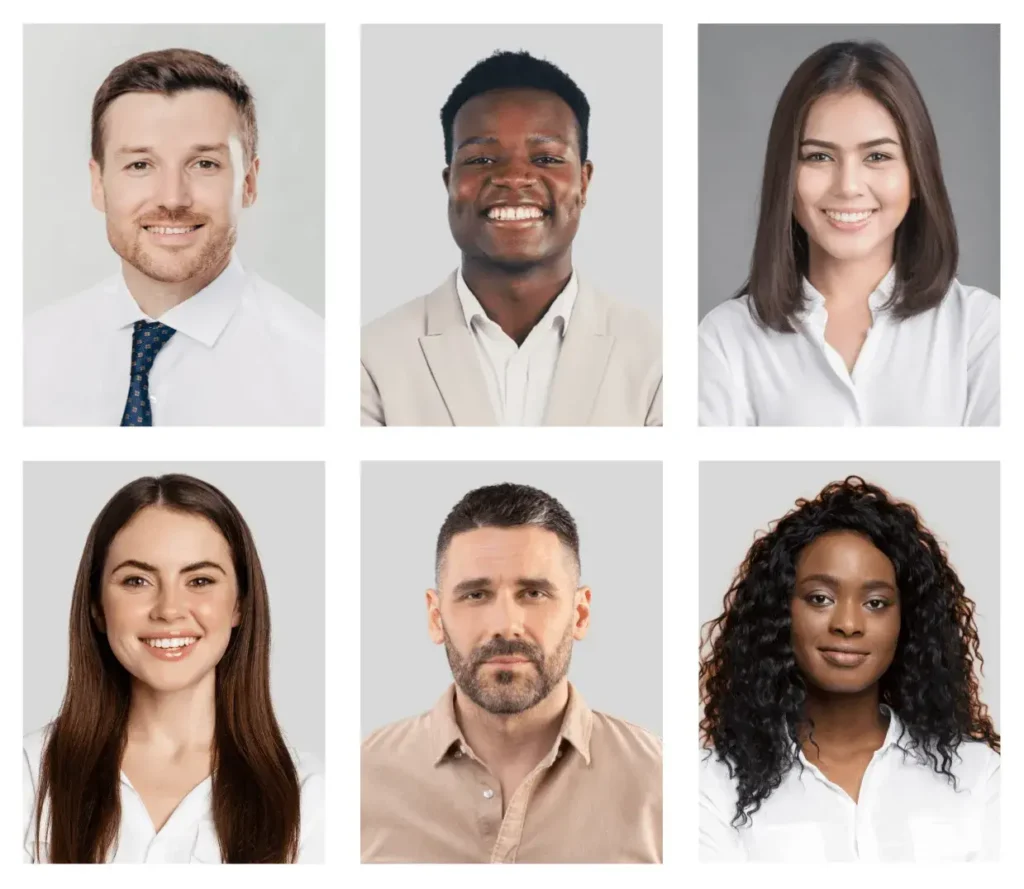
Creative headshots (350)
Creative headshots are headshots for people in creative industries, like art, design, and creative writing. These images are still professional headshots, but they use unique backgrounds, lighting, and expressions to highlight creative flair instead of corporate uniformity. Imagine bold or textured backgrounds, clothing that reflects your personal style, relaxed or candid expressions, and creative techniques that express your branding design.
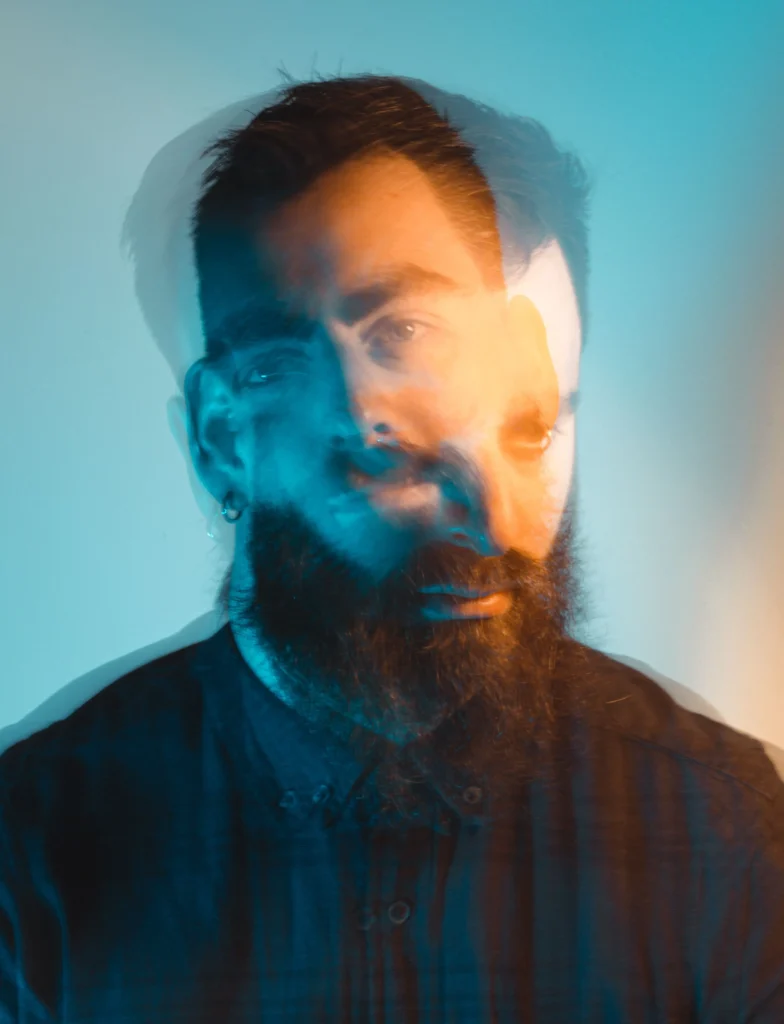
Professional acting headshots
Professional acting headshots are closely cropped so that the actor’s face and eyes are the focal point of the photography. They rely on simple lighting, backgrounds, makeup and very light editing to showcase your authentic look and personality to casting directors and agents. Actors typically have at least two core styles of headshots: a warm, commercial shot, and a more dramatic, theatrical one.
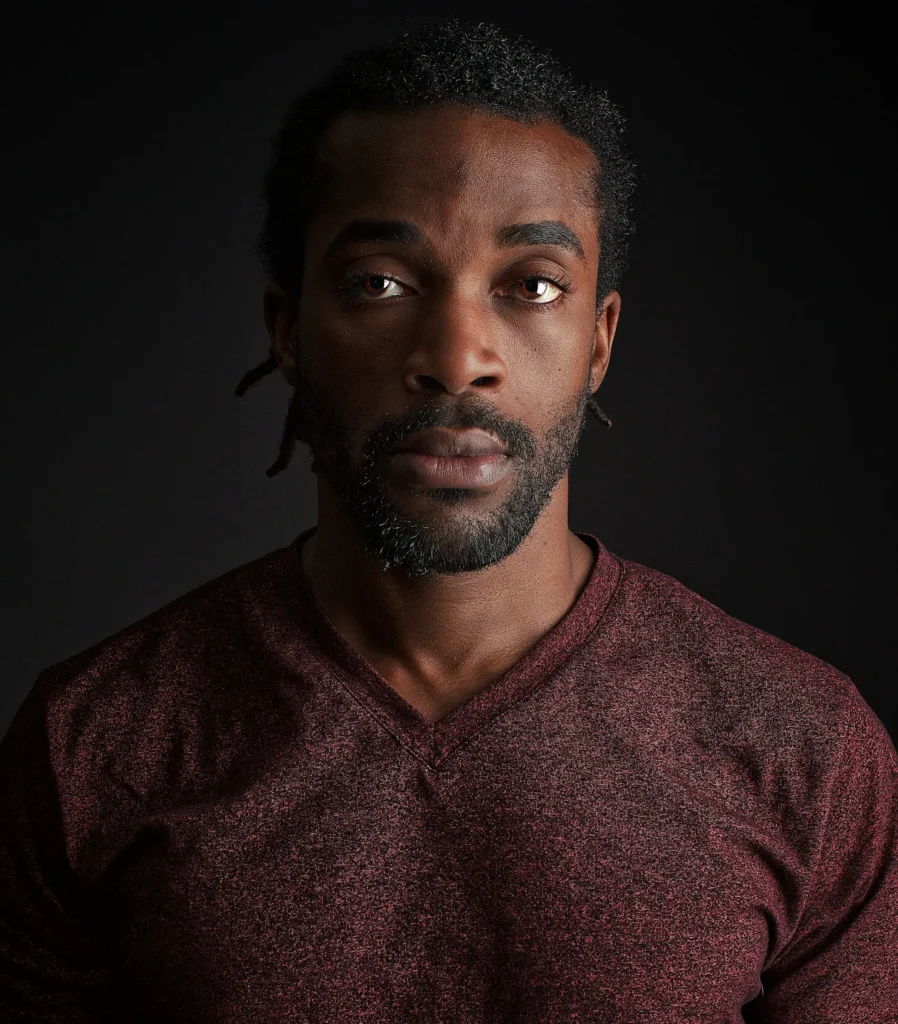
Academic headshots
Academic headshots may be used for CVs or resumes, faculty directories, research profiles, and speaker biographies. Similar to corporate headshots, academic headshots tend to be more conservative when it comes to background, lighting, and attire. Subjects may choose blazers, cardigans, or collared shirts to project a smart and scholarly image, and backgrounds usually feature neutral colors or blurred academic settings.

What should a professional headshot look like?
Depending on your industry and the type of headshot you’re taking, your photo may be more creative or more conservative. That said, there are some key elements all professional headshots should share.
A good professional headshot should:
- Have a high enough resolution and image quality to look crisp at various sizes
- Be up to date with how you look now (not how you looked 10 years ago)
- Crop your face, neck and shoulders so your face is the focal point of the image
- Feature an authentic expression and natural posture
- Use soft lighting that shows off your features without creating harsh shadows
- Include a clean and simple background that doesn’t distract from your face (solid or mottled neutral backgrounds or out-of-focus settings usually work well)
- Incorporate well-fitted clothing that is appropriate for your industry
- Create enough contrast between the background and your attire so that you stand out clearly
- Be minimally retouched so you look natural (and not as though you’ve been airbrushed or heavily edited with AI)
What makes a headshot look unprofessional?
A professional headshot doesn’t need to look overly formal or staged. However, certain technical or stylistic choices make an otherwise good photo look less polished, including:
- Low resolution or image quality that leaves your headshot grainy, blurry, or distorted
- Harsh lighting from direct flash or overhead lights that casts unflattering shadows
- Heavy retouching that removes skin texture or makes you unrecognizable from how you look in person
- Cluttered or messy backgrounds that distract from your face
- Awkward framing that often comes from cropping yourself out of a larger picture
- Unnatural body language that reads as uncomfortable or defensive (like crossing your arms or standing or sitting overly erect)
- Facial expressions that make you look insincere or unapproachable (like forced smiles, clenched teeth, and blank stares)
- Busy, distracting patterns or colors in your attire or headshot background
- An outdated appearance that doesn’t reflect how you currently look
These unprofessional qualities in a professional headshot can make people skip over you for opportunities, see you in a bad light, and lose trust when they meet you in person. This directly counteracts what a headshot should do: make it easy for people to recognize you in a way that feels appropriate to your profession, industry, and personal branding.
What to wear for professional headshots
One of the biggest questions people have when taking professional headshots is what to wear. This completely depends on your industry, as some sectors require formal, conservative clothing and others call for more colorful or eccentric attire.
Despite this, the bottom line is that your headshot outfit should support the image you want to project without competing with your face and your expression. These tips can help you choose what to wear for professional headshots without stressing out about it.
Focus on the upper half
Remember that a professional headshot is generally cropped to show the upper half of the body. So focus on the shirt, jacket, dress, etc. that you’ll wear on your top half. Don’t stress about bottoms unless you know they will appear in the photo.
Make decisions ahead of time
Plan your outfit ahead of time to avoid stress when taking your professional headshot. Planning ahead also gives you time in case you need to wash, iron, or steam the clothes you plan to wear. And if you’re taking a team or employee headshot, make sure to check if your organization provided any guidelines about attire.
Dress appropriately for your industry
Reflect on what people in your profession typically wear when they want to look professional and put together. Think, too, about how formal you want your image to appear. For example:
- Corporate and business professionals often choose tailored jackets, button-down shirts, blouses, modest dresses, or other business-appropriate clothing. In these industries, it’s usually preferable to maintain a modest, conformist appearance that implies reliability and trust.
- Academics also benefit from polished clothes, but often opt for clothing that is relatively understated when compared to corporate headshots. An overly structured blazer may feel like too much, for instance, while a nice sweater feels slightly more relaxed but still professional.
- Creative professionals have more flexibility when choosing a headshot outfit and can choose clothes that reflect their style. They typically incorporate bold colors, patterns, textures, and accessories in order to communicate their creative aesthetic.
When in doubt, choose an outfit that makes you feel comfortable and confident. Clothing that feels unfamiliar, overly restrictive, or just “not right” can negatively affect your posture and expression when shooting your professional headshot.
Choose colors that complement you
Color can greatly affect how professional your headshot looks and how well you stand out from your background. Choose clothing colors that complement your skin tone, hair color, and eye color while also creating enough contrast with what’s behind you in the image.
Color theory explores how colors influence your skin tone, convey psychology, and create visual contrast in photographs. Brushing up on color theory can help you look your best in professional headshots. A few basics are:
- Complementary colors, which sit opposite each other on the color wheel, can create contrast and help you stand out.
- Analogous colors, which sit next to each other on the color wheel, create a more harmonious, cohesive look.
- Dark colors (like black, dark gray, and navy blue) are usually perceived as formal, serious, sophisticated, and authoritative.
- Light colors (such as white, cream, and pastel blue) are often perceived as friendly, relaxed, and approachable.
- Bright colors (like red, yellow, and vibrant purple) can convey energy, creativity, and confidence, but they can dominate a headshot if they’re overused in the frame.
- Complexion should influence what colors you choose for your headshot attire. Lighter complexions work well with neutrals or more muted colors, while deeper or darker complexions can create striking contrast with a wider range of colors. However, there is no universal palette that works for everyone, so experiment if you’re not sure.
- Undertones also impact which colors are most flattering. People with warm undertones typically look better with warm, earthy tones and gold jewelry, while people with cool undertones often look best in cool tones and silver jewelry. Neutral undertones work with the widest range of colors.
Before your photo session, consider how your outfit will look against the background you have in mind. For example, wearing a light top against a light background may cause you to blend into the image.
Pay attention to fit and patterns
Your headshot clothing should fit properly and comfortably. A poorly fitted jacket, wrinkled shirt, or neckline that sits awkwardly can be more noticeable in a professional photograph than in everyday life. Moreover, ill-fitting clothes can make you feel uncomfortable, and that will show through in your photo.
As for patterns, simple ones can work well, but extremely busy prints, large logos, or reflective clothing will draw attention away from your face. If you go with a pattern, choose one that expresses your style while also creating a sense of harmony with your skin tone and background. And if you’re unsure, solid colors or understated patterns are safest.
Keep accessories and makeup balanced
Accessories can add personality to your professional headshot, but they shouldn’t become the focal point. Consider whether jewelry, glasses, scarves, or other accessories support the image you’re trying to create. Minimalist or timeless pieces work best, and you should avoid trendy pieces (like smartwatches or giant earrings), which can make your photo look dated.
As for makeup, it can help create a polished appearance, correct skin tone and texture, and reduce shine under studio lighting. But heavy makeup usually doesn’t translate well on camera. Your goal should be to look like yourself. Before settling on a makeup look for your headshot, ask yourself, “Would someone who meets me in person recognize me?”
Test your headshot at a small size
Once you’ve taken your professional headshot, do a final test to make sure it looks good at a small size. Your face should be clearly visible and the image shouldn’t feel cluttered and messy. This quick test makes sure your headshot will look good as a LinkedIn profile picture, image for an “About Us” website page, or CV picture.
How to pose for a professional headshot
Posing for a professional headshot can be uncomfortable, but it doesn’t need to be difficult. By learning and practicing a few key rules, you’ll have a great pose in no time.
Know four key types of poses
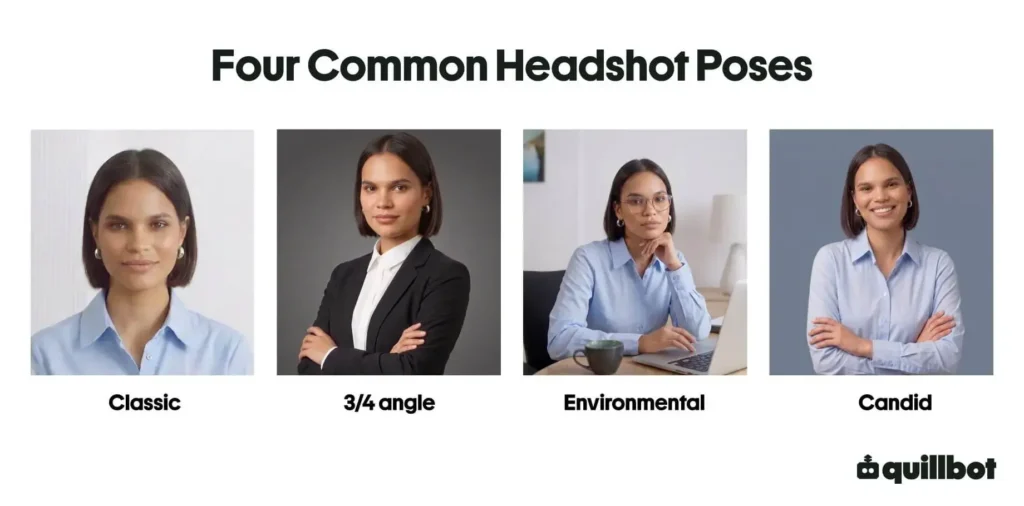
This isn’t a hard-and-fast rule, but broadly speaking, there are four common types of poses for professional headshots. The best one for you depends on your industry and the goal of your headshot.
| Pose type | Description | Best for | Communicates |
|---|---|---|---|
| Classic (front-facing) | You face the camera directly, with your shoulders square to the lens. | Corporate profiles and other traditional professional settings | Directness, confidence, and professionalism |
| Three-fourths angle | Your body is turned slightly away from the camera while your face remains directed toward the lens. | Most professional settings, especially when you want a polished but less formal look | Approachability, confidence, and dimension |
| Candid | You appear engaged in a natural action or interaction rather than deliberately posing for the camera | Creative professionals, websites, less traditional profiles, and anyone who wants to promote their personal brand identity | Authenticity, personality, and approachability |
| Environmental | You’re photographed in a setting connected to your work rather than against a plain studio background. | Creative professionals, entrepreneurs, personal branding, and portfolio websites | Personality, context, and connection to your work |
Control the angles of your head and face
It may seem ridiculous, but push out your neck, as a turtle or chicken might, and angle your chin down slightly. This stretches out your neck, gets rid of any potential double chin, and helps push your face closer to the camera lens.
If you have some freedom in your headshot pose, turn your face slightly to show off your best angle. You may also want to add a slight head tilt if you’re going for a less serious, friendlier vibe.
- Take quick snaps of your face at different angles to see which looks best.
- Take a video of your face as you move it from side to side and find the best still.
Be mindful of your posture and stance
Hinge slightly forward from your waist towards the camera. This creates a sense of confidence and engages the viewer. Keep your shoulders relaxed to avoid an overly stiff and unnatural posture. If you want to angle your shoulders, try doing so between 20–45 degrees, and make sure you drop the shoulder closest to the camera so you don’t look hunched.
Most professional headshots are cropped at the shoulders. But sometimes you may need to take a headshot that crops at the waist. In this case, be aware of what you do with your hands. Try keeping your arms a tiny bit away from your body or placing a hand or thumb in a pocket to create a slight bend in your arm.
Make eye contact with the camera
Look straight into the camera so that you create a direct, engaging connection with your audience. If you’re looking away from the camera, it can make you look disconnected or disinterested, which will most likely make your viewer feel the same. If you’re taking a candid headshot, you don’t need to look at the camera, and you should instead look just past the lens or at a specific person or object nearby.
Aim for a natural expression
Should you smile in your professional headshot? Yes, but not too much. Avoid the type of grimacing, teeth-bearing smiles you may have made years ago on school picture day. Instead, aim for a natural, true smile, whether that be exuberant or more reserved. This “true smile” is called a Duchenne smile, after the neurologist who realized that when you smile with authentic emotion, your entire face is engaged, while a fake or polite smile only moves the mouth.
Professional photographer vs DIY vs AI-generated headshot
There are several ways to execute your professional headshot. You could hire a professional photographer, take your own photo at home, or use AI to generate it. The table below outlines the pros and cons of each so you can choose which method is best for you.
| Professional photographer | DIY at-home method | AI generator | |
|---|---|---|---|
| Cost | Expensive, typically costs $150–500 per session | Free, assuming you have a smartphone or camera and natural light | Can be free, but depends on the fee charged by the AI tool you use |
| Convenience | Requires scheduling a session and potentially traveling to a studio | Can be done at home whenever you have time | Can generate images without a photo session |
| Control | Photographer controls lighting, composition, posing, and editing. | You have complete control over the setup and final selection. | You can influence the output through prompts or settings, but the AI controls many details. |
| Equipment needed | Nothing | Camera or smartphone, window with natural light, computer for editing; potentially tripod or backdrop | A computer and access to an AI-powered image generator |
| Image quality | Highest, with professional lighting and editing | Can be very good with the right tools | Varies by AI tool |
| Authenticity | Shows what you actually look like, perhaps in a more polished way | Shows what you actually look like | May gently alter your features to create an image that looks good but feels a bit “off” |
| Main pro | High-quality results | Final result is tailored exactly to your liking and genuinely looks like you | Most convenient |
| Main con | Higher cost and less convenient | Requires time, equipment, and some basic photography knowledge | May produce an image that looks artificial or doesn’t accurately represent you |
| Best for | High-stakes professional profiles, executives, and anyone who wants expert guidance | People on a budget or those who feel comfortable taking their own photos | Quick, affordable experimentation |
Combining DIY photography with AI
It’s generally not recommended to use AI to generate your headshot in its entirety. However, a blended approach of DIY photography with AI-assisted adjustments can work quite well. For example, you can take a photograph of yourself using a smartphone and then use AI-assisted editing tools for limited adjustments, such as:
- Increasing or decreasing the brightness or exposure of your photo
- Removing awkward shadows or distracting objects from the frame
- Swapping out the background for a more professional one
- Cropping or reframing the image for a specific platform
- Making subtle adjustments to color, contrast, or sharpness
This approach retains the authenticity of your photo while allowing you to make edits quickly and easily, and it’s especially useful if you don’t know how to use traditional photo editing software. That said, use AI editing mindfully. The goal of your headshot is to represent you professionally, so you don’t want to make changes that result in a misleading image.
How to take your own professional headshot
Knowing how to take your own professional headshot at home empowers you to get great results while saving time, money, and stress. Follow these 10 steps to take a great headshot at home.
1. Get the right camera or smartphone setup
Before you start snapping, make sure you have all the equipment you need. This may include a:
- Mirrorless or single-lens reflex camera
- Smartphone with a working rear-facing camera
- Tripod or stable surface
- Remote shutter or timer
- Friend to help you
- Soft cloth with lens cleaner
A modern smartphone can produce a high-quality headshot, but to do so, it’s best to use the rear-facing camera. That’s why a tripod or a friend will come in handy. Whatever camera you’re using, make sure to thoroughly clean the lens before beginning to make sure you get the crispest images possible.
2. Choose your look ahead of time
Choose your clothing, accessories, hair style, and makeup based on your industry, profession, and where you’ll use your headshot. Do this in advance to avoid stress when shooting your headshot. Consider how your clothing will contrast with your background, and make sure to choose an outfit you’re comfortable in. If you’re unsure, have a few options ready so you can take photos in each.
3. Select an appropriate background
Look for a clean, uncluttered background at home or in a space you feel comfortable in, like an office or a friend’s house. A plain wall, neutral backdrop, or softly blurred background generally works well. Just make sure the background doesn’t compete with your face and clothing.
4. Wait for the right time of day
Whenever possible, use natural light for your professional headshot. It’s a good idea to position yourself near a window or outside in shade, but avoid harsh, direct sunlight that creates dramatic shadows. When working with a window, pay attention to its orientation and how the light changes during the day. This will help you find the best time of day to take your headshot: when you’re well-illuminated in soft light.
5. Position your camera correctly
When you’re ready to shoot, position your camera at eye level or 2–3 inches above it, which adds warmth and approachability. If you shoot 2–3 inches lower than eye level, it can project authority, but can also make you come across as confrontational. Avoid extreme camera angles from above or below, which read as unprofessional.
Keep the camera or phone far enough away from you to avoid wide-angle distortion. If you’re shooting with a camera, the best overall lens for professional headshots is an 85mm prime lens. If you’re using a smartphone, it’s better to keep the phone farther away and zoom in rather than get up close to your face.
6. Compose and frame your shot
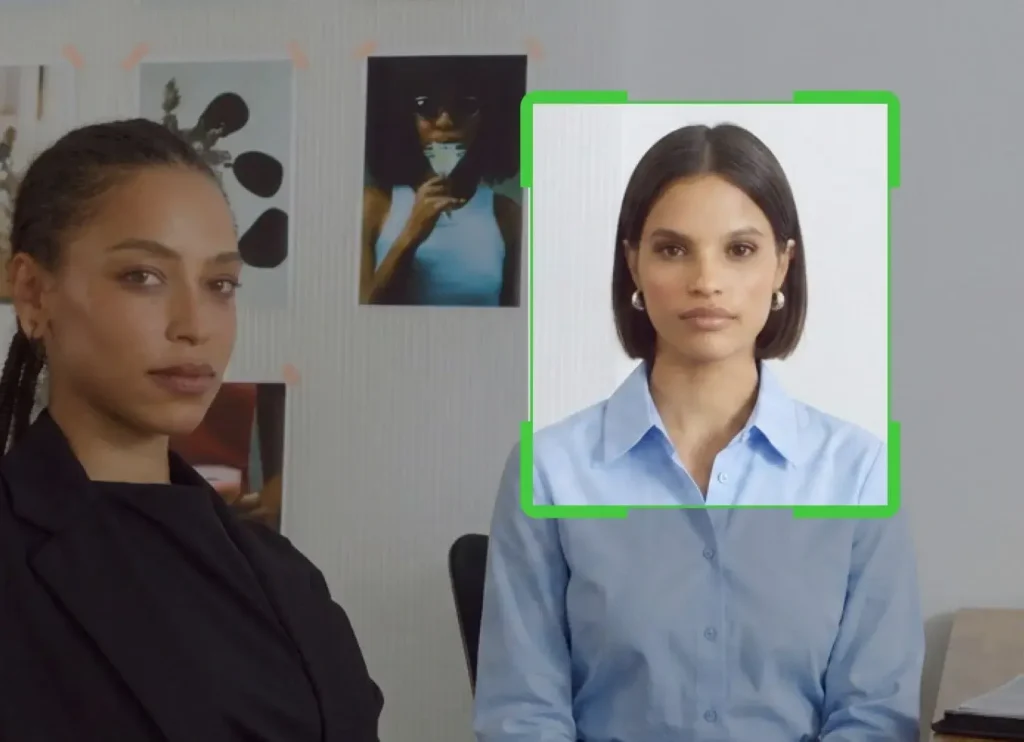
Position yourself naturally so that your head and shoulders fit into the frame and make sure your face is the main focal point. Your face should fill 60–70 percent of the frame. Don’t position your eyes dead-center; instead, position them about one-third of the way down from the top edge of the photo.
The top edge of your image should leave some space above your head, and the bottom edge should fall at the shoulders (unless you’re specifically taking a waist-up headshot). That said, you may also want to take some slightly wider shots so you have more flexibility when cropping for different platforms and channels.
7. Find your best pose and expression
Decide on which type of pose you’re going to employ: front-facing, three-fourths, candid shot, or environmental. Regardless of which you choose, there are a few guidelines to follow to find your best version of that pose:
- Relax your shoulders.
- Maintain a healthy, natural posture; don’t slump or be overly erect.
- Stick your neck slightly out and angle your chin forward and down.
- Make several different expressions instead of one forced smile.
Not sure which pose to use? Try several different poses and then review all your photos to choose the one you like best.
8. Take a bunch of photos
Take more photographs than you think you’ll need, making small adjustments to pose, expression, and head angle between shots. You can even make changes to your wardrobe between batches of shots. Review the images periodically to check your framing, focus, lighting, and expression.
To get one great headshot, aim for between 25–50 photos, although everyone is different. Some people need some time to warm up for a photo session, and others are confident from the first snap. Consider using burst mode with tiny changes to your posture and expression to generate even more options.
9. Select the best photo
Once you’ve finished your photoshoot, select the best image. If possible, ask a friend or family member to help you decide. Look for an image that:
- Is sharp and well-lit
- Naturally frames your face and shoulders (or can cleanly be cropped to do so)
- Shows an authentic expression
- Is appropriate for your profession and industry
- Includes clothing and accessories that are sitting correctly
- Doesn’t have any distracting elements
After you select the best, choose 1–2 other options to have on hand in case your final choice doesn’t work well everywhere you want to use it. For example, you may realize that a headshot that looks great on your website doesn’t look quite as good sized down on LinkedIn or Slack. Having other photos on hand gives you backups in these situations.
10. Edit your photos carefully
Now that you’ve selected your professional headshot, edit it based on what needs to be improved in the image. You can use professional editing software like Adobe Photoshop, or a free online tool like Quillbot’s Online Photo Editor.
Avoid heavy edits or filters that drastically change your appearance. Focus on:
- Adjusting brightness, contrast, color, and sharpness
- Straightening slightly crooked images
- Cropping the image for its intended use
- Removing minor distractions
- Lightly retouching the face
Export the final image at a sufficiently high resolution and appropriate file format for its intended use. PNG is generally a good format, as it’s lossless and it allows for transparent backgrounds. If you have a brand kit, add your new headshot there, so you have it saved somewhere you’ll always be able to find it.
Where will you use your headshot?
You can use your professional headshot across many types of digital profiles, marketing materials, and company branding. This table outlines some places you may want to use your headshot, why, and guidelines for doing so.
| Where | Why | Guidelines |
|---|---|---|
| A headshot helps potential employers, clients, and partners recognize you and form a first impression. A professional profile photo is one of the ways to stand out on LinkedIn, and a great photo combined with a strong LinkedIn summary can even tempt recruiters to make the first move. | Use a clear, close-up image where your face is easily recognizable. LinkedIn applies a circular crop to profile pictures, so leave enough space around your head to account for that. | |
| Portfolio or personal website | If you have a website, portfolio, or portfolio presentation, including a headshot puts a face to your work, helps establish your personal brand, and may even lead to more people reaching out. | Make sure your headshot style aligns with your profession and industry. For example, an art director probably shouldn’t appear in a suit and tie. Consider using both a traditional headshot and wider personal-branding photos. |
| Company website | Your headshot introduces you to potential clients, customers, or colleagues and helps humanize your company. | Apply the headshot style or photo guidelines mandated by your company. |
| Email signature | Having your photo in your signature puts a face to your name, humanizes you, and reinforces your professional identity in everyday communication. | Use a small, simple version of your headshot. Make sure your face remains recognizable at a small size. |
| Video meeting apps | A photo on video meeting apps helps colleagues and clients recognize you, especially when working with remote teams. | Many apps apply circular crops, so choose a clear photo that works well in that format. Make sure your face is easily recognizable. |
| Messaging and internal apps | Intranets and apps like Slack, Teams, and Asana play a big part in everyday communication. Having a photo helps people recognize you, gives them confidence they’re reaching out to the right person, and builds team morale. | Choose an image that makes you look friendly and approachable. Headshots used in this context, especially when only used within your organization, can often be less formal. |
| Business cards | It’s easier for clients to remember you and associate your face with your name and work if your business card includes your photo. | Use a high-resolution image suitable for print. Keep the crop relatively tight so your face remains recognizable at the small size of a business card. |
| Social media profiles | Using a headshot instead of a random photo of yourself builds recognition and creates consistency across your professional online presence. | Choose an image that remains recognizable as a thumbnail and works with the platform’s crop. Most networks crop profile pictures as a circle. |
| Event pages and speaker bios | A photo gives the audience a glimpse of who you are before an event, presentation, or conference. | Use a polished, current photo with a simple composition. Keep a high-resolution version available in case organizers need it for printed programs or promotional materials. |
| Resume or CV | Whether or not you include a headshot on your resume depends on where you’re applying for jobs. In North America, the U.K., and Australia, this is discouraged, but in Western Europe and parts of Asia, it’s expected. Research the resume format for your area in order to decide. | Choose a template that leaves space for your headshot. Use a clear, sharp photo that shows your face and shoulders. The photo should look good digitally and in print, in case your resume gets printed out. |
You don’t need a different professional headshot for every application, nor should you use exactly the same photo for every channel. Consider getting several crops and compositions from the same session, such as a tighter image for LinkedIn and a wider version for your website or marketing materials.
Frequently asked questions about professional headshots
- What is the best AI headshot generator?
-
The best AI headshot generator depends on your needs and the time and money you have available. There are many options out there to look into, including Headshot Pro, Aragon.AI, and Secta.AI.
Another good option is taking your own professional headshots at home and then fine-tuning them with Quillbot’s AI Headshot Generator. This helps you create an authentic image that feels like you without spending a lot of money or time on equipment and tools.
- How much does a professional headshot cost?
-
A professional headshot usually costs between $100–500 when working with a professional photographer. More premium, higher-end sessions may cost upwards of that. Prices depend on location, session duration, styling, and image deliverables.
If you want to find out more, try asking Quillbot’s AI Chat about how much professional headshots may cost based on your location and expectations.
- Can a headshot be a selfie?
-
Yes, a headshot can be a selfie if you frame and take the photo appropriately. To do so, use your rear-facing camera for higher image quality, keep your phone at eye level, and find good natural lighting and a neutral background.
You can also take professional headshots at home that look less like selfies by setting your phone up on a tripod or stable surface and using a timer or remote shutter. Then, edit them using Quillbot’s AI Headshot Generator to make light adjustments.